First Aid for Cuts: Your Expert Guide to Immediate Wound Care
Introduction
When skin is broken, whether a minor scrape or a deeper laceration, knowing immediate first aid for cuts is crucial. Prompt and correct action in providing first aid for cuts can minimize bleeding, prevent infection, and promote faster healing. This guide offers essential steps for effective first aid for cuts in various situations.
Understanding Different Types of Cuts and When First Aid is Needed
The term “cuts” encompasses various skin injuries. Abrasions involve superficial scraping of the skin, while lacerations are tears or jagged breaks. Puncture wounds, though often small, can be deep. Basic first aid for cuts is usually sufficient for minor abrasions and superficial lacerations.
However, deeper cuts, those with significant bleeding, or those involving embedded objects necessitate professional medical evaluation. Recognizing the severity of different cuts is the first step in determining appropriate first aid for cuts. Factors like the depth, location, and cause of the cut influence the necessary level of care.
Immediate First Aid for Minor Cuts: A Step-by-Step Approach
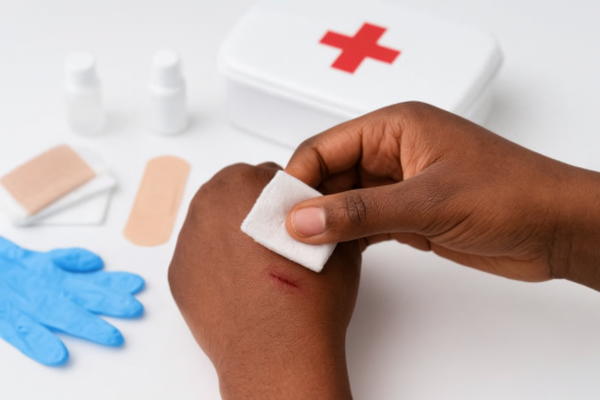
The initial response in first aid for cuts aims to stop bleeding and prevent contamination. Begin by washing your hands thoroughly with soap and water before providing first aid for cuts. Next, gently clean the cut itself with mild soap and water to remove dirt and debris – a fundamental aspect of first aid for cuts.
For persistent but minor bleeding, apply direct pressure to the cut using a clean cloth or sterile gauze. Elevating the injured area above the level of the heart, if feasible, can also help reduce blood flow during first aid for cuts.
Continue applying pressure for several minutes until the bleeding subsides. Once the bleeding has stopped and the cut is clean, apply a simple adhesive bandage to protect it and prevent further contamination, completing the initial first aid for cuts.
Providing First Aid for Deeper Cuts and Controlling Bleeding
When dealing with deeper cuts, the priority of first aid for cuts shifts towards effectively controlling more significant bleeding. For substantial blood loss from cuts, it’s crucial to call for emergency medical assistance immediately. While waiting for help, focus on applying firm, continuous pressure directly onto the bleeding site.
Use the palm of your hand or a clean, thick cloth if sterile gauze isn’t available when administering first aid for cuts. If the blood soaks through the initial dressing while providing first aid for cuts, do not remove it; instead, apply additional layers of clean material on top to maintain pressure.
Elevating the injured limb above the level of the heart can further aid in reducing blood flow to the deeper cuts, provided there are no suspected fractures. Encourage the injured person to remain still, as movement can exacerbate bleeding from the cuts.
Reassuring the individual can also help manage anxiety, which can indirectly affect blood pressure. Remember, sustained direct pressure is the cornerstone of first aid for cuts involving significant bleeding until professional help arrives.
When a Tourniquet is Necessary for Severe Bleeding from Cuts
In extreme cases of life-threatening bleeding from cuts affecting an arm or leg, and only when direct pressure and elevation fail to control the hemorrhage, a tourniquet may become a necessary component of first aid for cuts.
However, a tourniquet should be used as a last resort and ideally by individuals who have received specific training in its application. If circumstances demand its use as part of first aid for cuts, apply the tourniquet approximately two to three inches above the site of the bleeding, positioning it closer to the torso.
Tighten the tourniquet until the bright red, spurting blood flow stops completely. Once applied as part of first aid for cuts, it is vital to note the exact time of application, as this information is critical for emergency medical personnel. Do not loosen or remove the tourniquet until instructed to do so by paramedics or physicians.
While commercially manufactured tourniquets are preferred for their effectiveness, in dire situations where none are available, an improvised tourniquet made from a strong piece of cloth and a windlass (a stick or similar object) may be used as a temporary measure within first aid for cuts.
However, improper application can cause nerve damage or further injury, underscoring the importance of training.
Recognizing Signs of Internal Bleeding Related to Cuts and Trauma
While the focus of first aid for cuts is typically on visible external injuries, it’s important to be aware that significant trauma associated with how the cuts occurred can also lead to internal bleeding. Unlike external bleeding addressed directly by first aid for cuts, internal hemorrhage is not immediately apparent but can be equally dangerous.
Be vigilant for signs such as abdominal pain, tenderness, or swelling, which could indicate internal bleeding related to the incident that caused the cuts. Chest pain or shortness of breath might suggest internal injury in the thoracic cavity. Other indicators include coughing up or vomiting blood, or the presence of black, tarry stools.
The injured person might also exhibit signs of shock, such as pale, cool, or clammy skin, a rapid and weak pulse, increased heart rate, dizziness, or even loss of consciousness. While first aid for cuts won’t directly address internal bleeding, recognizing these signs and immediately seeking emergency medical attention is crucial for the individual’s survival.
Knowing When to Seek Professional Medical Attention After Providing First Aid for Cuts
While many minor cuts can be effectively managed with basic first aid for cuts, certain situations necessitate professional medical evaluation. Seek immediate medical attention for cuts that continue to bleed despite 10-15 minutes of direct pressure.
Deep cuts where underlying tissue is visible, or gaping wounds that may require stitches, also warrant professional care. Cuts involving embedded objects should not be disturbed; instead, seek medical help to have them safely removed. Injuries to the face, genitals, or those that cross joints often require specialized treatment to ensure proper healing and function.
Cuts resulting from animal bites or rusty objects carry a higher risk of infection and may require specific treatment, including tetanus prophylaxis. If signs of infection develop after initial first aid for cuts, such as increased pain, redness, swelling, pus, or fever, medical attention is necessary.
Finally, if there is any uncertainty about the severity of the cuts or the appropriate course of action, it is always best to err on the side of caution and consult a healthcare professional.
Important Things to Avoid When Administering First Aid for Cuts
When providing first aid for cuts, it’s crucial to know not only what to do but also what to avoid. Never attempt to remove large or deeply embedded objects from a wound, as this could cause further damage and increased bleeding. Avoid probing or excessively manipulating a severely bleeding cut, as this can disrupt clot formation.
Do not remove blood-soaked dressings; instead, apply clean layers on top to maintain pressure. Unless specifically instructed by medical professionals, avoid applying antiseptics directly into deep cuts, as some solutions can damage healthy tissue. Lastly, resist the urge to apply ointments or creams to actively bleeding cuts, as this can interfere with the clotting process. The initial focus of first aid for cuts should be on stopping the bleeding and preventing further contamination.
Preventing Infection After Providing First Aid for Cuts
Once the bleeding from cuts has been controlled through first aid for cuts, the next critical step is preventing infection. Ensure your hands are thoroughly washed before and after caring for the wound. Gently clean the cut again with mild soap and water to remove any remaining debris.
After cleaning, a thin layer of antibiotic ointment may be applied to minor cuts to help prevent bacterial growth, although this is not always necessary. Cover the cut with a clean, sterile bandage. Change the bandage daily, or more frequently if it becomes wet or soiled.
Monitor the cut for any signs of infection, such as increased pain, redness, swelling, warmth, or pus. Ensuring your tetanus vaccination is up to date is also an important aspect of preventing infection, especially for deep or dirty cuts.
Essential Items for Your First Aid Kit When Dealing with Cuts
A well-stocked first aid kit is indispensable for addressing cuts.
Key items to include are sterile gauze pads in various sizes for applying pressure and covering wounds, adhesive bandages of different shapes and sizes for minor cuts, medical tape to secure dressings, antiseptic wipes for cleaning the skin around the cut, disposable gloves to maintain hygiene, a pair of scissors for cutting tape or dressings, and tweezers for removing small splinters or debris from superficial cuts.
Having these readily available ensures you can provide prompt and effective first aid for cuts.
Conclusion
Knowing how to administer first aid for cuts is a fundamental life skill that can significantly impact the outcome of common injuries. By following these essential steps and maintaining a well-equipped first aid kit, you can confidently and effectively manage cuts, minimizing complications and promoting recovery.
Remember that prompt and appropriate first aid for cuts can make a crucial difference in preventing infection and ensuring proper healing.
Can you use hydrogen peroxide on a cut?
While hydrogen peroxide can kill bacteria, it can also damage healthy tissue and may impede the healing process. Gentle cleaning with mild soap and water is typically sufficient for first aid for cuts.
What are the signs that a cut is infected after first aid?
Signs of infection following first aid for cuts include increasing pain, redness spreading from the wound, swelling, warmth around the cut, the presence of pus or drainage, and potentially a fever.
Is it better to let a cut air out or keep it covered?
Generally, keeping a cut covered with a clean bandage provides a moist environment that promotes faster healing and offers protection against infection, which is a key consideration in first aid for cuts.
Should you put a bandage on a small cut?
Yes, after cleaning the minor cut, applying a bandage helps protect it from dirt, germs, and further irritation, promoting healing as part of first aid for cuts.
How do you stop a minor cut from bleeding?
Apply gentle, direct pressure to the cut using a clean cloth or sterile gauze. Maintain this pressure for several minutes without lifting to allow blood clotting, a fundamental aspect of first aid for cuts.